
The Quick Start Guide for Participating in an ICO
Few things are as exciting as the launch of a new initial coin offering (ICO). But if you’re new to the club, the process for actually participating in an ICO can be downright confusing. Most of the popular guides on the subject assume that you’re already familiar with the basics of both managing cryptocurrency and the process of trading crypto tokens on an exchange. It’s not exactly a user-friendly system. But not to fear. A little knowledge can be comforting.
All ICOs function differently so it’s important to study the process at the IOC projects’ websites. However, one thing for sure – if you investing with Ether you should NEVER attempt to send directly from an exchange wallet.
In this guide, we’ll be taking you through the quickest, easiest method for participating in an ICO with Ether. By following our step-by-step process, you’ll be ready to join the ICO investing and trading community in no time!
To start, let’s define a few essential terms.
Ethereum: Often written as ETH, Ethereum is the blockchain-based cryptocurrency that most ICOs use during launch. It’s similar to bitcoin, but has features that make it better suited for ICOs, smart contracts, and other advanced uses.
Coinbase: As the premier cryptocurrency brokerage, Coinbase makes buying ETH (as well as bitcoin and Litecoin) both safe and easy. It’s a good idea to set up your Coinbase account as early as possible (don’t worry, it’s free) so that you can avoid any hiccups or delays with payment verification.
Wallet: In order to access your ETH or other cryptocurrency, you’re going to need a way to store your coins. This is called a wallet. For this guide, we’re going to ignore desktop wallets, as they require hours — or even days — to sync with the ETH blockchain. Instead, we’re going to use an online wallet. Coinbase is a kind of online wallet, but it’s not designed with ICOs in mind. There are many ICO-ready wallets out there, but a good place to start is with MyEtherWallet.
ICO Tokens: Most ICO tokens (or coins) are really just a subset of ETH coins, and don’t require their own dedicated cryptocurrencies. Instead, they use a special kind of ETH wallet. These tokens are easy to manage and trade using MyEtherWallet or similar wallet software.
Now, let’s move on to the Quick Start guide.
Step 0: Sign up with Coinbase. If you don’t already have ETH coins, you’ll need to purchase some in order to participate in most ICOs. If you already have an ETH wallet, or already have a Coinbase account, skip ahead to Step 2.
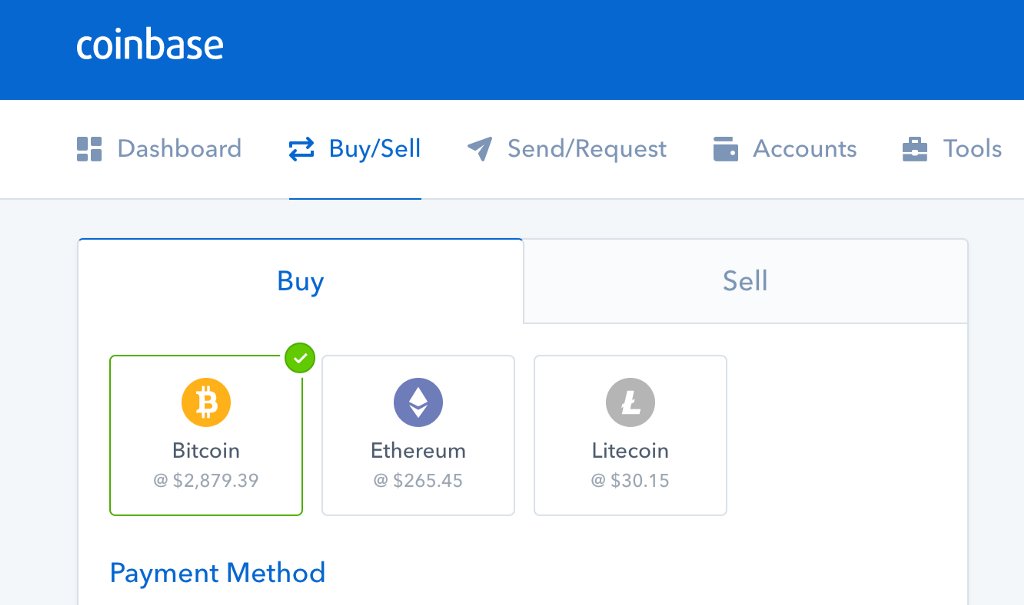
Step 1. Buy some ETH through Coinbase. Depending on how your account is set up and your payment method, buying ETH via Coinbase can take anywhere from a few seconds to a week, so do this step as early as possible. It’s a straighforward process, but if you’re confused just follow these simple steps to purchase your ETH.
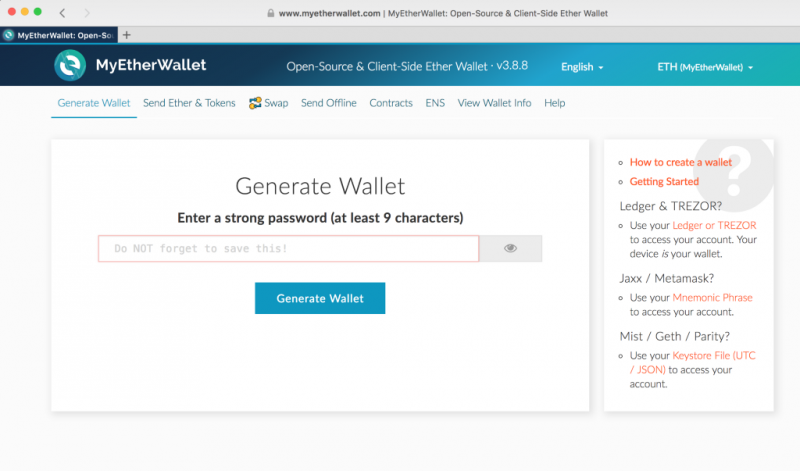
Step 2. Create a ETH wallet with MyEtherWallet. The process is simple, and we’ll explain each step as we go. To start, just enter a password into the field and click “Create New Wallet.”
Step 3. Download your Keystore file. Simply click on the large, blue button and the UTC/JSON file will ask for permission to download. All those warnings are serious: Keep this file in a safe place! It can’t be recovered from the site if you lose it! When you’re ready, click on the “I understand. Continue.” button to move to the next step.

Step 4. Save your private key. The long string of numbers and letters you see on the page is the private key for your ETH wallet. Anyone with this key has full control of your ETH, so keep this information in a safe, secure place. You’ll also be prompted to print out a “Paper Wallet,” which is an easy way to store this essential information in an offline format. Once you’ve done all that, click the “Save Your Address” button to proceed.

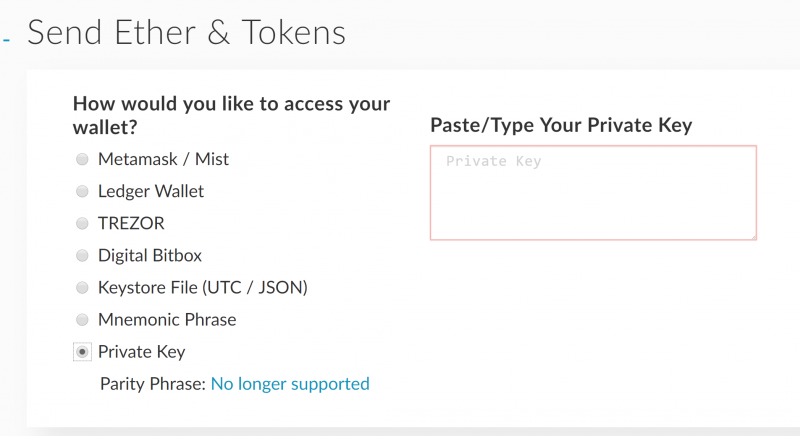
Step 5. Save your account address. Your ETH address (also known as your public key) is kind of like a phone number. Anyone who wants to send ETH to your wallet — including you — will need this address, and it’s fine to share it. Don’t be confused by all the available options presented here. We’re keeping things simple, so simply select the “Private Key” option. This will open up a new box that asks you to enter your private key.
Step 6. Paste or type your private key into the box. Your ETH wallet address is generated by your private key, so make sure it’s correct. Once you’ve entered the key, unlock you new ETH wallet by clicking the big, blue “Unlock” button.
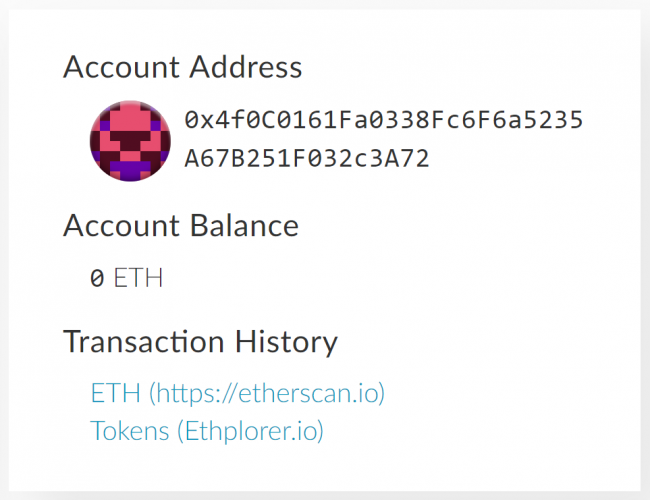
Step 7. Find your account address. Once you’ve unlocked your wallet, you will be able to scroll down on the page and see new details about your address. At the top of this new section is a field marked “Your Address.” This string of numbers and letters is safe to share, as it allows other people to send ETH to your wallet. Save this number, as you will be using in the next step. (It’s also on your paper wallet.)
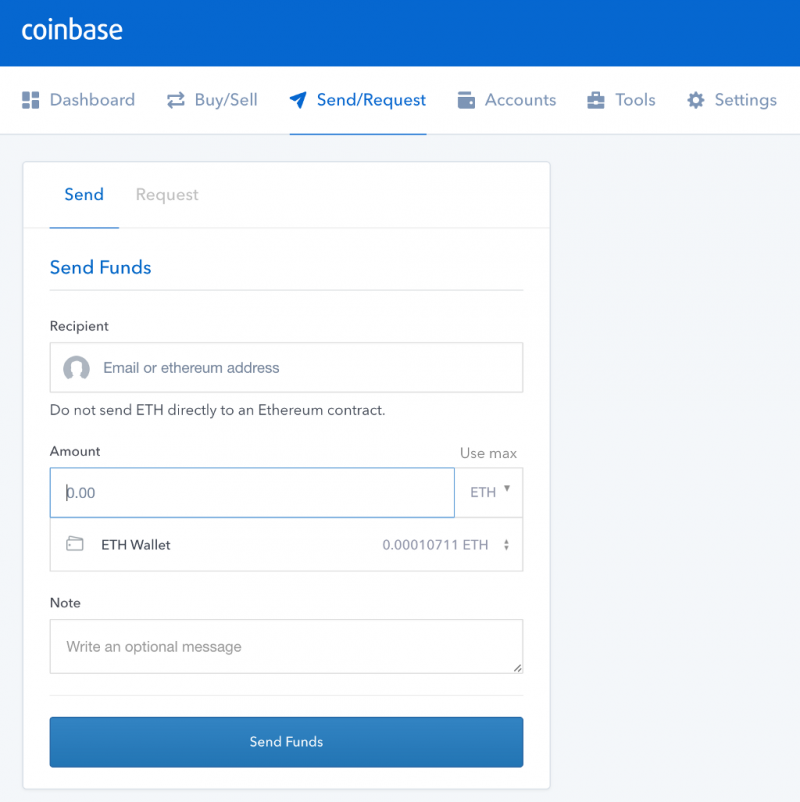
Step 8. Log into Coinbase and send yourself some ETH. Once you’re logged into Coinbase, select the “Send/Request” tab. Select the “Send” option, and then enter the public address (not your private key!) from your MyEtherWallet into the “Recipient” field. Select the ETH option under the “Amount” dropdown, and then enter the amount of ETH you want to send to your new wallet. When you’re ready, click the big, blue “Send Funds” button.
Step 9. Go back to MyEtherWallet. If you are not doing all of this in a single session, you will need to re-enter your password and private key to access your account. Select the “Send Ether & Tokens” tab to access your wallet, and once again click on the “Private Key” option to unlock the wallet you previously created. This will take you to your account page, and display your current ETH balance. The Ethereum network is fast, but it may still take a few moments for the transaction to show up if you’ve just sent it from Coinbase.
Step 10. Send ETH to the ICO address. Every ETH-based ICO will have a dedicated address to send funds to. From the “Send Ether & Tokens” page, paste or type that ICO address into the “To Address” field. Then, type in the amount of ETH you want to send into the “Amount to Send” field. Double check everything, and when you’re satisfied that everything is correct, click on the big, dark blue “Generate Transaction” button.
Step 11. Click on the “Send Transaction” button. This is it! You’re done.
That’s all there is to it! Your MyEtherWallet will now track the token you’ve created in addition to your regular ETH wallet.
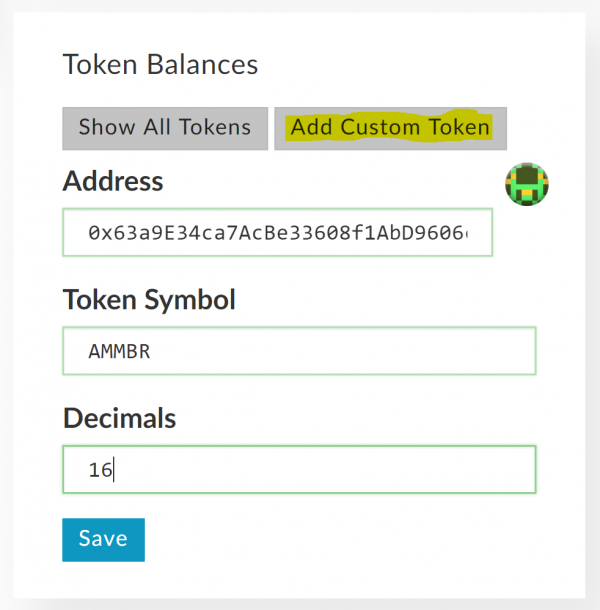
Step 12. Set up Custom Token wallet. Now that you’ve sent ETH to the pre-ICO address, you need to set up a wallet for those ICO tokens. While the specifics will change with each ICO, the process is the same. On the lower, right-hand side of your MyEtherWallet page is a section that reads “Token Balances.” Click on the “Add Custom Token” button. Paste or type the pre-ICO address you sent your ETH to in Step 10 into the “Address” field, and the token symbol (the name of the token itself, such as AMMBR for Ammbr tokens) into the “Token Symbol” field. The ICO token will also have an associated decimal value, so make sure to add that into the “Decimal” field. For the example of AMMR tokens, this is 16. Double check everything, then click the “Save” button.
That’s all there is to it! Your MyEtherWallet will now track the token you’ve created in addition to your regular ETH wallet.